Sublime Text 3 Developer Setup
My developer setup after upgrading to Sublime Text 3.
on
Sublime Text 2 has been my editor of choice for a long time. I’ve been meaning to upgrade to version 3 for a while, and finally got around to it recently! This post lists the setup I worked through to get to my Sublime Text 3 workflow. While I was at it, I also upgraded from using vanilla terminal to iTerm2 and Oh-My-Zsh. More on that later.
If you’ve also had this task on your to-do list for a while, this post will save you some time! And if you’ve yet to try out Sublime Text, maybe you should! In a recent Stackoverflow survey Sublime Text was listed as one of the most popular text editors.
These instructions are Mac specific and therefore some of the config will not be relevant for other platforms, but the packages I reference will be available for these platforms.
Installation
It’s important to keep in mind that version 3 is still a beta release, but it is widely used and has been stable for me so far. You can download version 2 if you are feeling risk averse, but if you like to live dangerously you can get version 3 here. They are separate versions so 2 and 3 can be installed side-by-side without issue.
Opening Sublime Text from the Terminal
In the past I have always launched ST from the terminal using:
subl .
subl file.js
subl my_folder
As I now have version 2 and 3 installed, I have setup symlinks for both versions as follows.
Version 2:
ln -s "/Applications/Sublime Text 2.app/Contents/SharedSupport/bin/subl" /usr/local/bin/sub2
Version 3:
ln -s "/Applications/Sublime Text.app/Contents/SharedSupport/bin/subl" /usr/local/bin/sub3
This allows me to switch between the two in the terminal by typing either sub2 or sub3, where the number indicates the target version.
To open with version 2:
sub2 .
sub2 file.js
sub2 my_folder
To open with version 3:
sub3 .
sub3 file.js
sub3 my_folder
NB Mac users, in the sublime documentation for this step the example uses ~/bin/subl. It may be that the path ~/bin/ does not exists for you, in which case use /usr/local/bin/ as I have done in the examples, it’s effectively the same thing.
By way, if you want to remove an older symlink, enter the following via the terminal:
unlink /usr/local/bin/subl
Sublime Text 3 Theme Setup
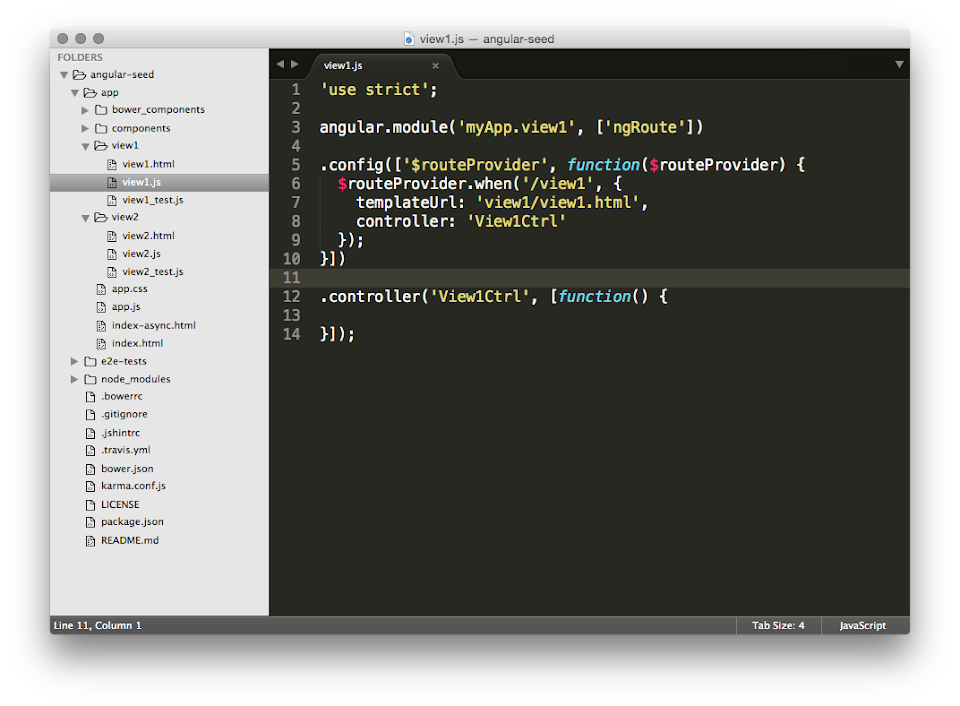
I stumbled across the Seti theme for Sublime Text 3, which is very nice indeed! By default, the Sublime Text interface looks like this (it’s nice, but could be better):
To set-up the Seti theme, you need to install the following packages:
- Seti_UI - changes the sublime text UI theme (changes side bar icons, colour) and syntax colour scheme.
- Seti_UX - a new/better syntax highlighter (optional).
If you don’t already have package control installed, I recommend doing so, it’s the easiest way to manage packages. Once installed, enter shift + ⌘ + P and type ‘install package’, hit enter and then select the option and it will prompt for a package name.
Type in Seti_UI and select from the list of packages to be installed. Read through the installation message once installed and note that you have to edit Sublime Text > Preferences > Settings - User and update the following keys:
  "theme": "Seti.sublime-theme",
  "color_scheme": "Packages/Seti_UI/Scheme/Seti.tmTheme"
It also recommends to install ApplySyntax for better syntax recognition. Do as we did before, typing ApplySyntax at the install package prompt.
NB you need to quit Sublime Text fully and restart in order for the sidebar to apply the dark theme.
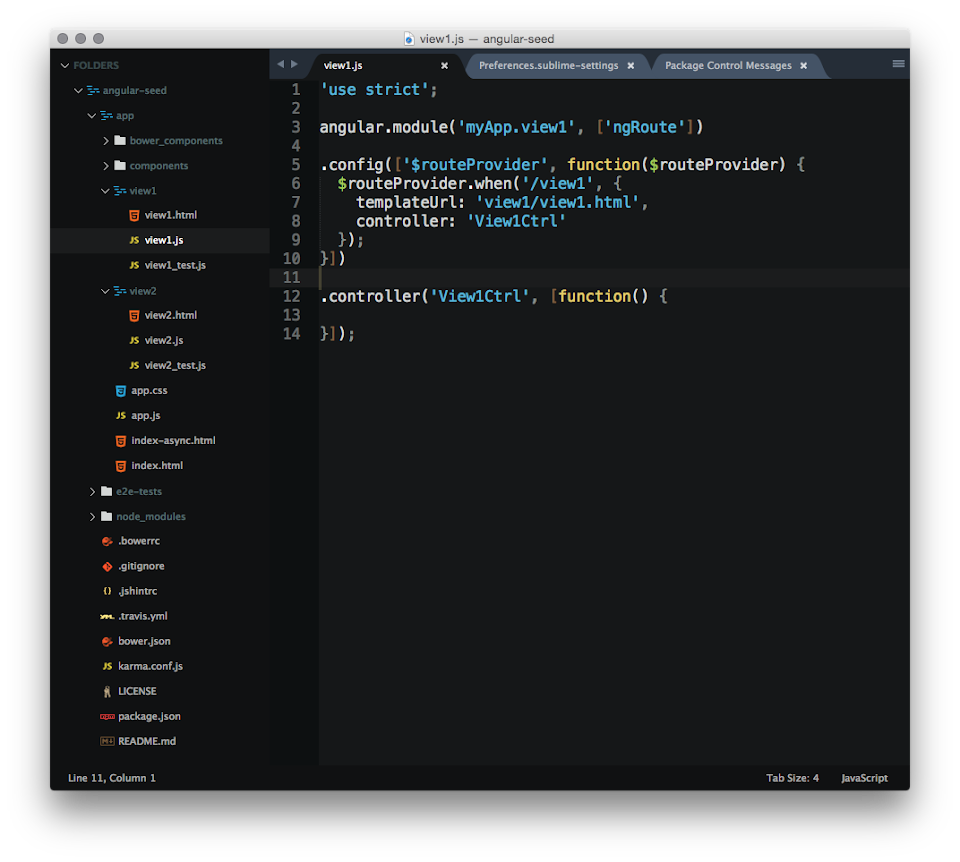
After the restart, the interface will look like this, note in particular the icons based on the file types in the side bar. It’s an excellent enhancement:
The additional installation of Seti UX is optional, but is recommended in the Seti_UI documentation as it extends support for Syntax highlighting. In fact, it has twice the number of settings in the theme file than Seti_UI, so it therefore has extended depth and greater language coverage. If you do install Seti_UX, keep in mind that you have to activate it post-install via Sublime Text > Preferences > Color Scheme > Seti UX > Seti. At present, I’m undecided whether I prefer the syntax theme of Seti_UI, but I will continue to experiment with the two. If you’ve decided between the two, please share your thoughts in the comments.
I also found this useful video tutorial covering the installation steps in more detail.
Custom Key Bindings
This is a personal preference, but I find that I toggle the side-bar to be shown/hidden a lot, and the default key binding of ["super+k", "super+b"] i.e. ⌘ + k, ⌘ + b, is too long for me. I changed this binding to be ctrl + s a long time ago, which is now committed to muscle memory.
If you want to try this out too, add the following to Sublime Text > Preferences > Key Bindings - User. It saves me a lot of extra ⌘ + b key presses every day:
[
  { "keys": ["ctrl+s"], "command": "toggle_side_bar" }
]
Linters
I use the following linters for automatic error detection in .js and .css files within Sublime Text. All of these can be installed via package control as we did with the themes.
-
SublimeLinter - This is the core linter that integrates the following plug-ins within Sublime Text. All the following plug-ins depend on this.
-
SublimeLinter-jshint - Hooks into jshint, indicating linting errors in-line whilst working with the file in question.
-
SublimeLinter-json - Hooks into Sublime’s default mechanism for parsing JSON, indicating any errors against the line of the file in question.
-
SublimeLinter-csslint - In-line linting for CSS, which flags CSS errors for the file/line in question.
There are a lot more plug-ins available for SublimeLinter.
Working with MarkDown
My blog is powered by Markdown and I write all my posts in Sublime. These are some useful packages that I use for editing Markdown:
- Markdown Extended - this includes better syntax highlighting for headings, lists etc.
- Markdown Preview - a handy tool for previewing the HTML output of a markdown file.
I use a tool called Marked for previewing markdown files, which isn’t free. Therefore the previously mentioned Markdown Preview plug-in will work similarly if you don’t have this.
If you happen to be a Marked user, you can integrate previews with sublime text by creating a custom build step as follows:
- Select Tools > Build System > New Build System
- Paste in the below JSON
- Save the file (I named it Marked.sublime-build)
- Select the new Marked build option for the active markdown file
{
   "shell": "true",
   "cmd": ["open -a marked \"$file\""],
   "file_regex": "^(...*?):([0-9]*):?([0-9]*)",
   "selector": "text.html.markdown"
}
Now you can simply hit ⌘ + B and Marked will open, rendering the active markdown file that’s for preview.
Upgrading to iTerm
I switched from using the default Terminal to iTerm2. I found this handy video series called Command Line Power User that detailed how to install iTerm2 and ZSH and includes some getting started tips. I won’t duplicate the setup here, the videos are easy to follow.
But keep in mind that there is also a Seti theme available for iTerm to accompany our snazzy new Sublime Text theme. You can find it here: Seti Theme for iTerm.