This is Part 4 of a 5 part Mean Stack Tutorial.
In this tutorial we switch our focus to the /public/ folder. We will add a basic screen to accompany our category API end-point and reflect the logic in the UI. AngularJS is a large framework that does a lot. The intention of this tutorial is to get something running rather than diving into technical detail.
What’s AngularJS?
AngularJS describes itself as a Superheroic JavaScript MVW Framework. The strap line is HTML enhanced for web apps!
The W of MVW means Model-View-Whatever i.e. MVC, MVVM. Given it’s a framework we get a lot of functionality out of the box, it’s easy to test and it adds its own layer on top of HTML markup (which we will see shortly).
Creating our first Angular Module
An angular “module” is a way of grouping things that make up an app. It’s often described as being a bit like namespacing in C# or Java, although that’s not quite acurate as naming conflicts are not avoided between objects if they are in different modules.
Our first step will be to create the module for the components that make up the categories functionality.
Back to using Yeoman and the CLI, run the following and accept the default options with the exception of tests (we won’t be looking at angular tests in this tutorial). To unselect, use the arrow keys for up/down and hit space to un-check tests:
yo meanjs:angular-module categories
In the public/modules/categories folder we now have some folders and files. The structure is as follows:
- categories
- config
- controllers
- services
- views
- categories.client.module.js
The folders are empty (we will fill in the blanks) and the file categories.client.module.js is created with the following. This code lets the main app know about our new categories module:
'use strict';

// Use application configuration module to register a new module
ApplicationConfiguration.registerModule('categories');
If you want to see what ApplicationConfiguration.registerModule does, see the file public/config.js.
To see a visual change in the UI we will start by adding some menu items. Run the following and using the arrow keys, select the ‘categories’ module we just added from the list:
yo meanjs:angular-config categories
We now have a new file at public/modules/categories/config/categories.client.config.js.
Replace its contents to be:
'use strict';

// Configuring the Articles module
angular.module('categories').run(['Menus',
	function(Menus) {
		// Set top bar menu items
		Menus.addMenuItem('topbar', 'Categories', 'categories', 'dropdown', '/categories(/create)?');
		Menus.addSubMenuItem('topbar', 'categories', 'List Categories', 'categories');
		Menus.addSubMenuItem('topbar', 'categories', 'New Category', 'categories/create');
	}
]);
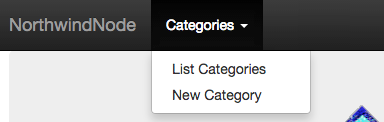
Start up the app (npm start), login using the default functionality (create an account if you don’t already have one) and you should now see a ‘Categories’ menu item with drop down options.
Important Note
I had to make a change to the configuration of the meanjs project to prevent a JavaScript error I was seeing in the console output of the browser when clicking on the drop down menu. The error is Uncaught TypeError: Cannot read property ‘getToggleElement’ of null. If you can live with the error in the console window for the purposes of following this tutorial, then you can ignore it since the menu still works.
If you don’t see this error, then skip this step. If you do and want to stop it, in the file bower.json change the following from:
"angular-bootstrap": "~0.11.2",
To:
"angular-bootstrap": "~0.12.0",
You then need to run the command:
bower update angular-bootstrap
I had to then update the contents of the file public/modules/core/views/header.client.view.html with this HTML to make the menu work. It may be that this has been fixed since, so if the version number in the bower file isn’t 11.2 then you can skip this step.
Adding Views
The two options in our new menu item are to list and create categories but these pages don’t exist so clicking on the menu items does nothing. Let’s start with the listing of categories.
To add a basic template of route, controller and view use the following (accept the default options based on the name ‘categories’):
yo meanjs:angular-route categories
The new files created are:
- public/modules/categories/config/categories.client.routes.js
- public/modules/categories/controllers/categories.client.controller.js
- public/modules/categories/controllers/categories.client.controller.js
- public/modules/categories/views/categories.client.view.html
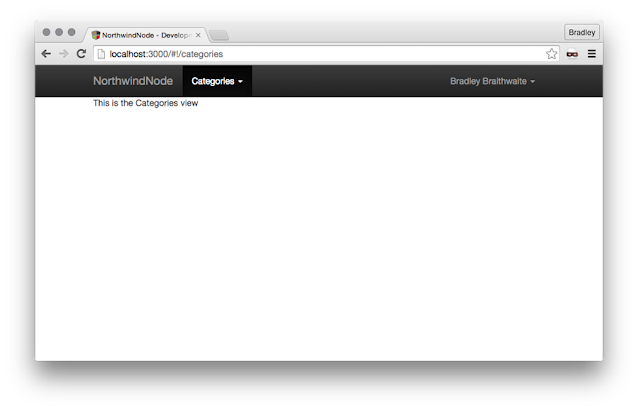
Selecting the Categories > List Categories menu item now redirects us to a shell page that looks as the following image:
Next we want to add a page for the New Category menu link.
Run the following command to generate the view:
yo meanjs:angular-view create-category
For the options:
- Which module does this view belong to?
- Choose: categories
- What is the name of the controller this view will use?
- Enter: Categories
- Would you like to add a route for this view?
- Choose: Y (the default)
- What is your view route path?
- Enter: /categories/create
A new view file is added:
- create public/modules/categories/views/create-category.client.view.html
Replace its contents with the following HTML:
<section data-ng-controller="CategoriesController">
    <div class="page-header">
        <h1>New Category</h1>
    </div>
    <div class="col-md-12">
        <form class="form-horizontal" data-ng-submit="create()" novalidate>
            <fieldset>
                <div class="form-group">
                    <label class="control-label" for="name">Name</label>
                    <div class="controls">
                        <input type="text" data-ng-model="name" id="name" class="form-control" placeholder="Name" required>
                    </div>
                </div>
                <div class="form-group">
                    <label class="control-label" for="name">Description</label>
                    <div class="controls">
                        <textarea name="description" data-ng-model="description" id="description" class="form-control" cols="30" rows="10" placeholder="Description"></textarea>
                    </div>
                </div>
                <div class="form-group">
                    <input type="submit" class="btn btn-default">
                </div>
				<div data-ng-show="error" class="text-danger">
					<strong data-ng-bind="error"></strong>
				</div>
            </fieldset>
        </form>
    </div>
</section>
Key Point
The attribute data-ng-controller=”CategoriesController” is what Angular meant by “enhancing HTML for web apps”. This attribute is telling the framework that the logic for this view is held in the CategoriesController.
data-ng-model=”name” and the other similar attributes bind the input element to the controller’s model.
It’s an over-simplification, but mostly where we see data-ng-SOMETHING it’s a way of gluing the HTML element to a property or function in the corresponding controlller.
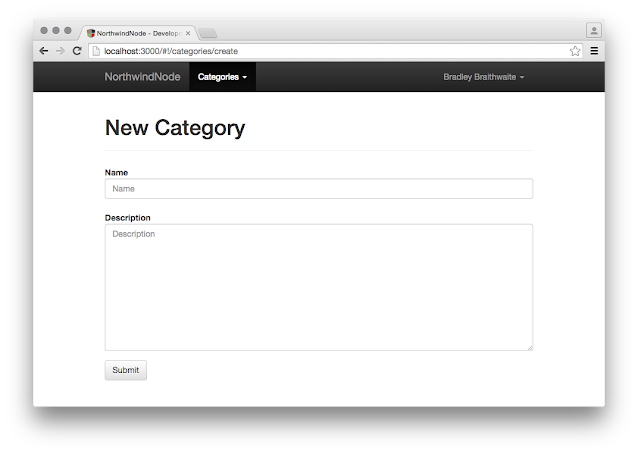
Now when navigating to the Create Category page (http://localhost:3000/#!/categories/create) you should see:
Having problems viewing the page? It may be possible that the forward slash has not been correctly added for the route: ‘/categories/create’.
Check that the contents of public/modules/categories/config/categories.client.routes.js is the same as:
'use strict';

//Setting up route
angular.module('categories').config(['$stateProvider',
	function($stateProvider) {
		// Categories state routing
		$stateProvider.
		state('categories', {
			url: '/categories',
			templateUrl: 'modules/categories/views/categories.client.view.html'
		}).
		state('createCategory', {
			url: '/categories/create',
			templateUrl: 'modules/categories/views/create-category.client.view.html'
		});
	}
]);
Before we move on let’s go back and replace the contents of public/modules/categories/views/categories.client.view.html (the list view) with:
<section data-ng-controller="CategoriesController" data-ng-init="find()">
    <div class="page-header">
        <h1>Categories</h1>
    </div>
    <div class="list-group">
        <a data-ng-repeat="category in categories" data-ng-href="#!/categories/{{category._id}}" class="list-group-item">
			<h4 class="list-group-item-heading" data-ng-bind="category.name"></h4>
            <span data-ng-bind="category.description"></span>
        </a>
    </div>
    <div class="alert alert-warning text-center" data-ng-hide="!categories.$resolved || categories.length">
    	No categories yet, why don't you <a href="/#!/categories/create">create one</a>?
    </div>
</section>
At this stage we have the HTML to display the data, the routes to tell angular which views are for which route, but what about the data? Next we need to add the bit in between these components that talks to the server.
The controller file was already scaffolded for us and can be found at /public/modules/categories/controllers/categories.client.controller.js. The default contents will be:
'use strict';

angular.module('categories').controller('CategoriesController', ['$scope',
	function($scope) {
		// Controller Logic
		// ...
	}
]);
Key Point
Note in the controller we have a variable called $scope. This is the model that represents elements of the view. If you recall in our template we had data-ng-model=”name”, which means this property can be accessed via $scope.name, $scope.description and so on. We can get or set this property i.e. $scope.name = ‘hello world’;
Replace the controller code with the following:
'use strict';

angular.module('categories').controller('CategoriesController', ['$scope', '$location',
	function($scope, $location) {

		// Create new Category
		$scope.create = function() {
			// Redirect after save
			$location.path('categories');

			// Clear form fields
			$scope.name = '';
		};

		// Find a list of Categories
		$scope.find = function() {
			// hard coded data
			$scope.categories = [{
				'name': 'Beverages',
				'description': 'Soft drinks, coffees, teas, beers, and ales'
			},
			{
				'name': 'Condiments',
				'description': 'Sweet and savory sauces, relishes, spreads, and seasonings'
			}];
		};
	}
]);
Key Point
The controller should be only concerned with handling data from the view.
Navigate back to http://localhost:3000/#!/categories and the hardcoded categories will be listed.
To replace the hardcoded data we will use an Angular Service to call our web server. To create a service, run:
yo meanjs:angular-service categories
A new file is created at:
- public/modules/categories/services/categories.client.service.js
Replace the contents with:
'use strict';

//Categories service used to communicate Categories REST endpoints
angular.module('categories').factory('Categories', ['$resource',
	function($resource) {
		return $resource('categories/:categoryId', { categoryId: '@_id'
		}, {
			update: {
				method: 'PUT'
			}
		});
	}
]);
Key Point
This service will be passed to our categories controller and is only responsible for calling the API endpoint /categories. A key feature of this service is that it’s using an Angular Resource ($resource).
An Angular $resource is an object that allows us to interact with a server-side data resource that is RESTful. Since our /categories end-point follows this RESTful approach it saves up having to write boiler-plate code as the angular resource object follows the same convention of GET, POST, DELETE etc when interacting with the /categories endpoint.
We have a service that talks to our server side category model and now we need to tell the categories controller about it. Replace the category controller code with:
'use strict';

angular.module('categories').controller('CategoriesController', ['$scope', '$location', 'Categories',
	function($scope, $location, Categories) {

		// Create new Category
		$scope.create = function() {
			// Create new Category object
			var category = new Categories ({
				name: this.name,
				description: this.description
			});

			// Redirect after save
			category.$save(function(response) {
				$location.path('categories/' + response._id);

				// Clear form fields
				$scope.name = '';
			}, function(errorResponse) {
				$scope.error = errorResponse.data.message;
			});
		};

		// Find a list of Categories
		$scope.find = function() {
			$scope.categories = Categories.query();
		};
	}
]);
Key Point
Our Categories service is ‘injected’ into the controller along with other angular services: $scope and $location. Names with the $ prefix are angular services that are part of the framework. We already talked about $scope and $location is an angular service for handling browser redirects. Think of it as an angular abstraction for window.location.
Dependency injection is a big topic and a key part of Angular. You can read more here.
Note: If you have any previous data saved in the categories collection that has a different schema the delete those documents. Also if you see errors in the console log you may need to restart the web server.
Remaining Functionality
Now that we have an idea of the basics, we need functionality for View, Update and Delete.
You can view the source files below to copy/paste the code to add this functionality.
Controller
Update the contents:
Route
Update the contents:
Views
Create these files:
Searching & Paging
Searching and paging functionality was presented in the introduction, so let’s enhance what we have so far when listing categories.
Replace the contents of categories.client.view.html with:
<section data-ng-controller="CategoriesController" data-ng-init="find()">
    <div class="page-header">
        <h1>Categories</h1>
    </div>
    <!-- this is the new search input field -->
    <div class="form-group">
        <input type="text" ng-model="search" typeahead="category as category.name for category in categories | filter:$viewValue | limitTo:8" class="form-control" typeahead-on-select="categorySearch($item)" placeholder="Search Category...">
    </div>
    <!-- end -->
    <div class="list-group">
        <a data-ng-repeat="category in categories | limitTo: offset - categories.length | limitTo: pageSize" data-ng-href="#!/categories/{{category._id}}" class="list-group-item">
            <h4 class="list-group-item-heading" data-ng-bind="category.name"></h4>
            <span data-ng-bind="category.description"></span>
        </a>
    </div>
    <!-- this is the paging control -->
    <pagination total-items="categories.length" ng-model="currentPage" ng-change="pageChanged()" max-size="pageSize" ng-show="categories.length > pageSize"></pagination>
    <!-- end -->
    <div class="alert alert-warning text-center" data-ng-hide="!categories.$resolved || categories.length">
        No categories yet, why don't you <a href="/#!/categories/create">create one</a>?
    </div>
</section>
The two new elements we added are part of the brilliant Angular UI Bootstrap.
In particular we are using:
Key Point If you notice the ‘pagination’ tag and are questioning if this is valid HTML? It’s an Angular Directive. This is part of the magic of how Angular enhances HTML. This element is actually rendered in the browser as an unordered list (UL). Angular Directives is a big topic, so at this stage we will just show an example rather than digging into the technical detail.
We need to extend the controller to add the new functionality to power these new directives.
Here is the code:
'use strict';

// Categories controller
angular.module('categories').controller('CategoriesController', ['$scope', '$stateParams', '$location', 'Authentication', 'Categories',
	function($scope, $stateParams, $location, Authentication, Categories) {
		$scope.authentication = Authentication;
	  	$scope.currentPage = 1;
	  	$scope.pageSize = 10;
	  	$scope.offset = 0;

	   // Page changed handler
	   $scope.pageChanged = function() {
	  		$scope.offset = ($scope.currentPage - 1) * $scope.pageSize;
	   };

		// Create new Category
		$scope.create = function() {
			// Create new Category object
			var category = new Categories ({
				name: this.name,
				description: this.description
			});

			// Redirect after save
			category.$save(function(response) {
				$location.path('categories/' + response._id);

				// Clear form fields
				$scope.name = '';
			}, function(errorResponse) {
				$scope.error = errorResponse.data.message;
			});
		};

		// Remove existing Category
		$scope.remove = function(category) {
			if ( category ) {
				category.$remove();

				for (var i in $scope.categories) {
					if ($scope.categories [i] === category) {
						$scope.categories.splice(i, 1);
					}
				}
			} else {
				$scope.category.$remove(function() {
					$location.path('categories');
				});
			}
		};

		// Update existing Category
		$scope.update = function() {
			var category = $scope.category;

			category.$update(function() {
				$location.path('categories/' + category._id);
			}, function(errorResponse) {
				$scope.error = errorResponse.data.message;
			});
		};

		// Find a list of Categories
		$scope.find = function() {
			$scope.categories = Categories.query();
		};

		// Find existing Category
		$scope.findOne = function() {
			$scope.category = Categories.get({
				categoryId: $stateParams.categoryId
			});
		};

		// Search for a category
		$scope.categorySearch = function(product) {
			$location.path('categories/' + product._id);
		};
	}
]);
Main changes are:
- Calculate the page index:
		// Page changed handler
		$scope.pageChanged = function() {
			$scope.offset = ($scope.currentPage - 1) * $scope.pageSize;
		};
- A function to handle the search select event, that redirects to the detail page of the category.
     // Search for a category
     $scope.categorySearch = function(product) {
         $location.path('categories/' + product._id);
     };
- Added properties for the paging control:
$scope.currentPage = 1;
$scope.pageSize = 10;
$scope.offset = 0;
Challenge for the Brave
Repeat this process for the products api end-point at http://localhost:3000/products.
Next Tutorial
Read the conclusion of this tutorial:
View the Full Source on Github
The full source for this project is hosted on Github. Note that this version is evolving and may differ slightly from this tutorial as new features are added for the subsequent tutorials.
